【Kotlin】NavigationとFragmentで画面遷移を管理する【Android】
2020.09.02

どうも、むつたくです。
今回はAndroidで使ってみて実際に便利だったと思ったコントローラを紹介します。
紹介するコントローラはNavigationです。
SwiftでiOSアプリを開発しているときはStoryBoardがあり、視覚的に画面遷移がわかったので、他の人が作成したプロジェクトでも動きが容易に理解できました。そしてそれをAndroidでもやりたい場合、近しいことを実現するためにNavigationを使用します。
Navigationですが、ActivityやFragmentの画面遷移を視覚的に表示できますし、画面間の値渡しを型安全にできる等良いこと尽くしです。
開発環境
- Mac Catalina 10.15.3
- Android Studio 3.6.2
- Xperia 5
- Android OS 10
ここで注意ですが、Nagigationを使用するにあたり、Android Studioのバージョンが「3.3」以上が必要になります。
今回やること
Navigation Controllerのスタートガイドは こちら になります。
Navagationの特徴
Navigationには以下の特徴があります。
- Fragmentで画面遷移を実装する場合は、FragmentTransactionの処理をNavigationが行ってくれる。
- 画面遷移の処理(進む、戻るアクション)を正しく処理できる
- 画面遷移の際に使用するアニメーションを簡単に設定できる
- Navigation Controllerを使用しているActivity・Fragmentは型安全に値のやりとりができる
- 画面遷移を視覚的に表現することができる
- 視覚的に表現できるEditorも簡単に作成できる
他にもいろいろ使用することによって恩恵はあります。詳細は公式の こちら で。
ただ、原則として以下のことにも注意して下さい。
- 起動する画面を必ず1つ決め固定し、戻るアクションでアプリ終了する時も起動画面を通過して終了する
- システムナビゲーションバーの「戻る(<)」ボタンと、アプリバーの「上へ」ボタンは同じ機能にする
- アプリバーにある「上へ」ボタンではアプリを終了させない
詳細は公式の こちら を参照して下さい。
Fragmentの作成
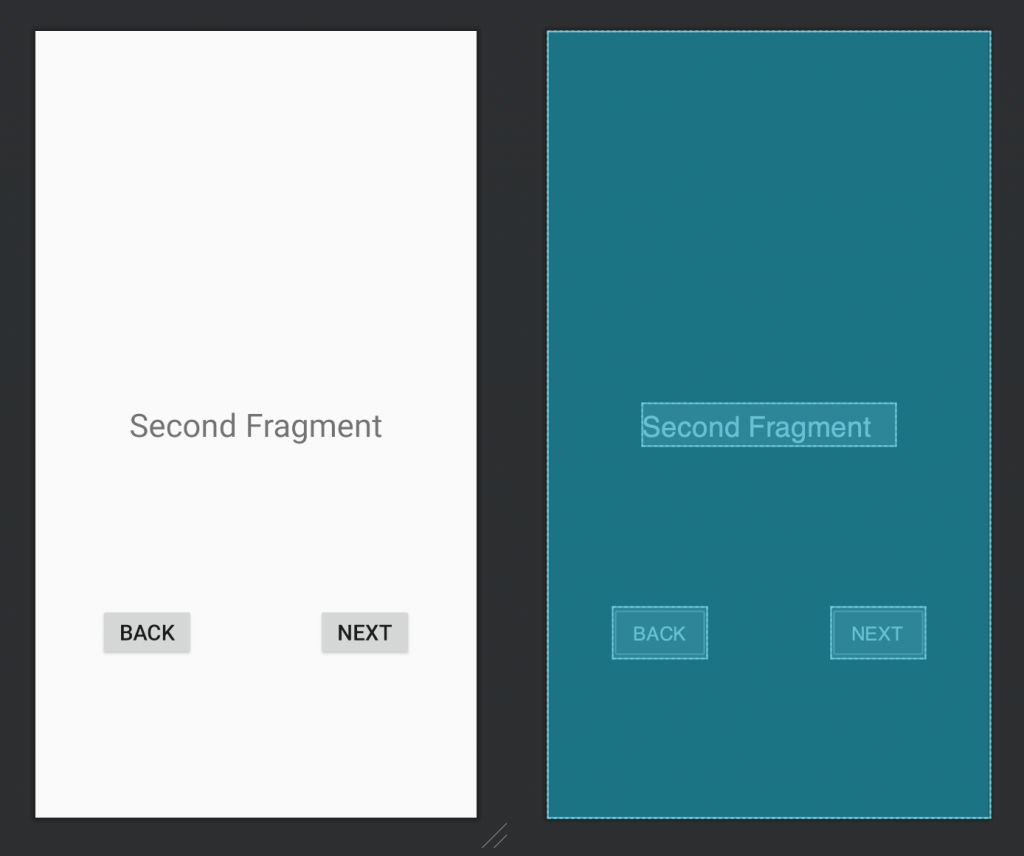
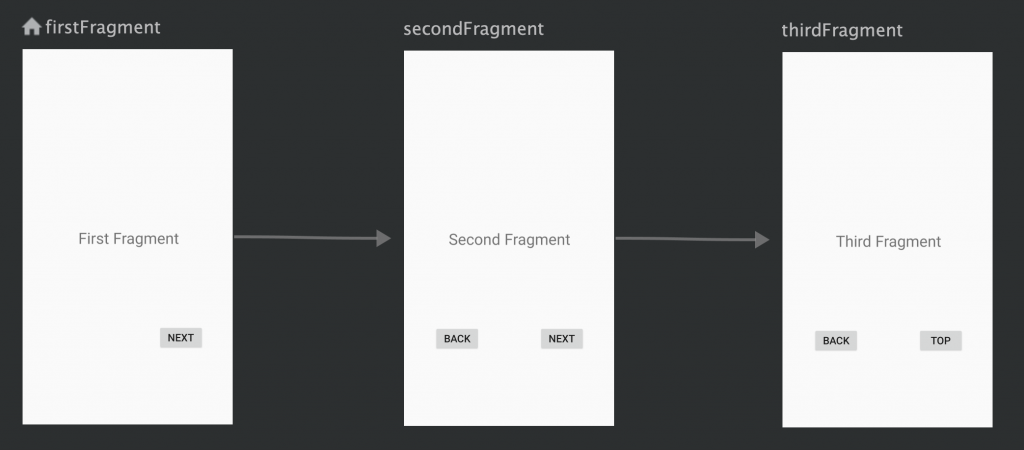
Fragmentを3つ作成します。Fragment名をそれぞれ「FirstFragment」、「SecondFragment」、「ThirdFragment」とします。
FirstFragment.xml
[cc_xml]
[/cc_xml]

SecondFragment.xml
[cc_xml]
[/cc_xml]
ThirdFragment.xml
[cc_xml]
[/cc_xml]
Navigationをプロジェクトに導入
では、早速プロジェクトにNavigationを導入していきましょう。
appのbuild.gradleに以下を追加します。
[cc_kotlin]
dependencies {
def nav_version = “2.3.0”
implementation “android.arch.navigation:navigation-fragment-ktx:$nav_version”
implementation “android.arch.navigation:navigation-ui-ktx:$nav_version”
}
[/cc_kotlin]
バージョンアップのことも考慮してバージョンは変数にしてます。もちろん、変数にせず直接指定するのも問題ないです。
そして「Sync Now」を実行して同期しましょう。
これで導入は完了です。
Navgation Graphの作成
次にNavgation Graphを作成します。
[ res or app を右クリック > New > Android Resource File ]を選択します。
もしくは[ ツールバー > File > New > Android Resource File ]を選択します。
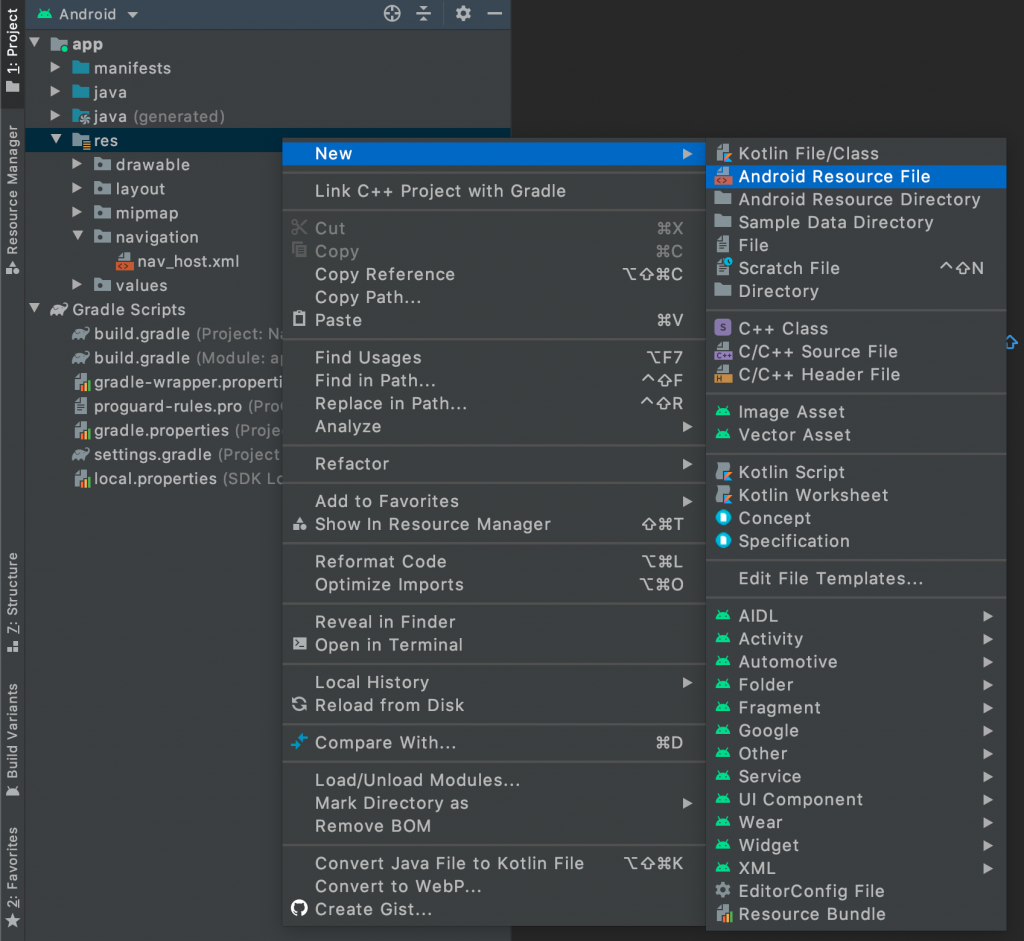
そうしましたら[ New Resource File ]ダイアログが表示されますので、以下の様に作成します。
File nameは何でも構いません。
Resource Typeは必ず[ Navigation ]にします。
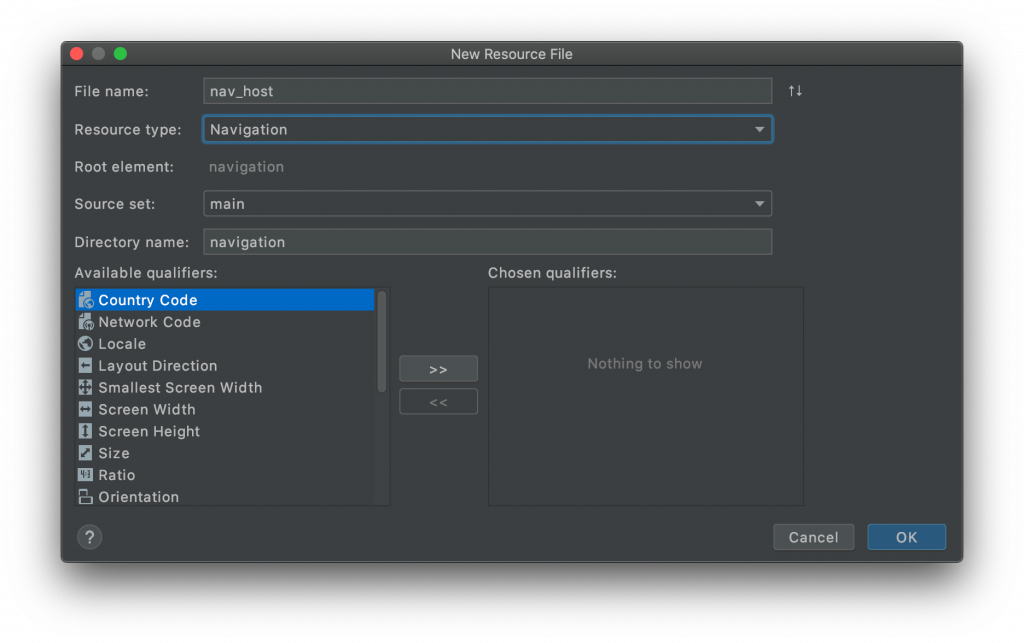
完了したら[ OK ]ボタンをクリックします。そうしますと、resディレクトリに新たに[ navigation ]ディレクトリが作成され、その中に[ nav_host.xml ]が作成されます。
Navigation Graphへの適用
Fragmentの作成が完了したら、Navigation Graphに作成した3つのFragmentを追記します。
First → Second → Thirdの順に遷移させるように設定します。
[cc_xml]
[/cc_xml]
navigationタグのapp:startDestinationに最初に表示するFragmentのIDを設定することを忘れずに。
fragmentタグの中のidは、一意のIDを記載します。またnameに関しては、先ほど作成したFragmentを記述します。そうすることにより、NavigtionとFragmentの紐付けができる様になります。
パッケージ名.ディレクトリ名.フラグメント名の様になります。ディレクトリ名(ここではui)は、作成していないと[ com.swallow_incubate.navisample.FirstFragment ]の形になるので、注意してください。
fragmentタグ中のactionタグですが、こちらのidも一意となるidを作成します。
destinationには、遷移先の[ fragment id ]を記述します。
画面遷移の実装
main_activity.xml
[cc_xml]
[/cc_xml]
[ fragment ]タグを追加します。
idはいつもの様に一意のIDを設定します。
nameはNavHost実装のクラス名を入力します。(決まり文句の様なもの)
navGraphには先ほど作成したNavigation GraphのIDを入力します。
defaultNavHostは基本trueで問題ないかと。trueの場合は、Navigation Graph内のスタックされたFragmentに戻ることができ、falseの場合はFragmentがスタックされていても戻ることはできません。一方通行のイメージです。
これでアプリを起動すると[ FirstFragment ]が表示されます(app:startDestinationに設定したFragment)。
あとは各Fragmentに遷移処理を記載するだけです。方法は、クリックリスナを作成し、Navigation Graphで作成したactionを記述すればOKです。
FirstFragment.kt
[cc_kotlin]
override fun onCreateView(inflater: LayoutInflater, container: ViewGroup?, savedInstanceState: Bundle?): View? {
val view = inflater.inflate(R.layout.fragment_first, container, false)
view.buttonNext.setOnClickListener {
findNavController().navigate(R.id.action_firstFragment_to_secondFragment)
}
return view
}
[/cc_kotlin]
FirstFragmentからSecondFragmentに遷移したいので使用するaction idはFirstFragmentとSecondFragmentを結んでいる[ action_firstFragment_to_secondFragment ]になります。
SecondFragment.kt
[cc_kotlin]
override fun onCreateView(inflater: LayoutInflater, container: ViewGroup?, savedInstanceState: Bundle?): View? {
val view = inflater.inflate(R.layout.fragment_second, container, false)
view.buttonNext.setOnClickListener {
findNavController().navigate(R.id.action_secondFragment_to_thirdFragment)
}
return view
}
[/cc_kotlin]
今度はSecondFragmentからThirdFragmentに遷移したいので、使用するaction idはSecondFragmentとThirdFragmentを結んでいる[ action_secondFragment_to_thirdFragment ]になります。
ひとまずこれでFirst→Second→Thridの順に画面遷移が出来ました🙌🎉
前画面に戻る
システムの戻るボタンを使用せずに前画面に戻る
もしかしたら、システムの戻るボタンを使わせたくない時があるかもしれません。あまりないと思いますが・・・。
そんな時は、Navigation Graphのfragmentタグの中に新しいアクションを作成します。
対象はSecondFragmentおよび、ThirdFragmentになります。
nav_host.xml
[cc_xml]
[/cc_xml]
SecondFragment.kt
下記のコードを[ onCreateView ]に追加します。
[cc_kotlin]
view.buttonBack.setOnClickListener {
findNavController().navigate(R.id.action_back_to_firstFragment)
}
[/cc_kotlin]
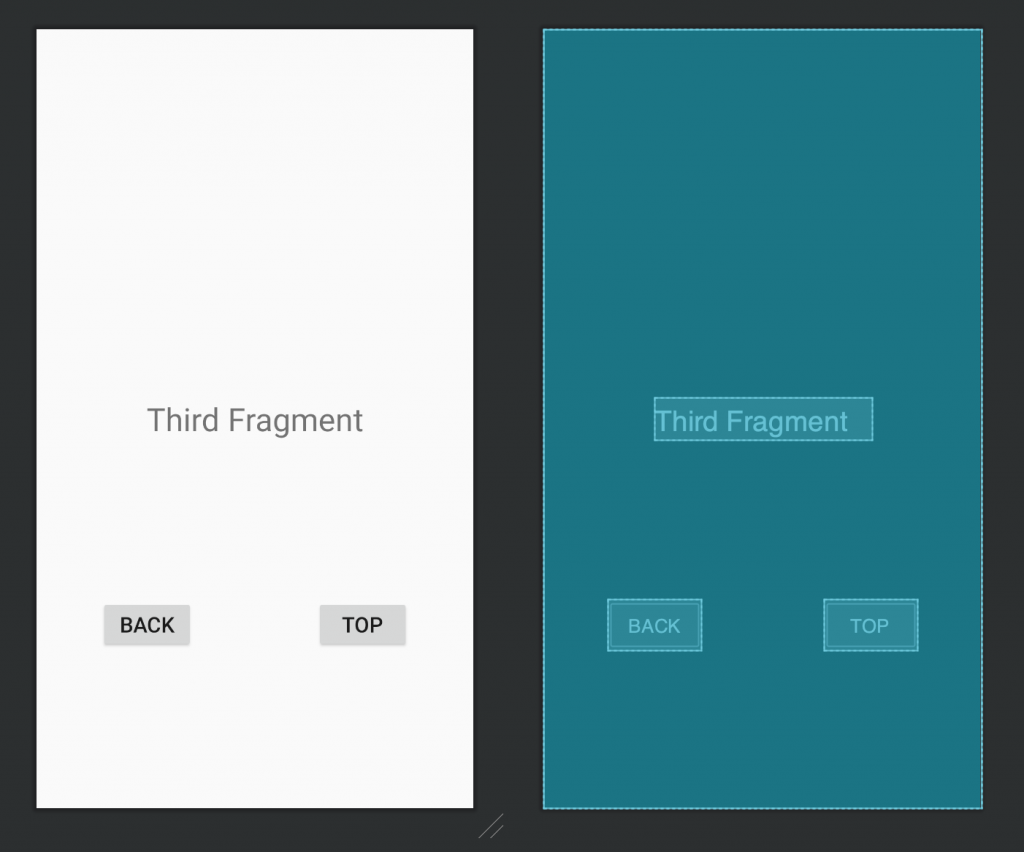
ThirdFragment.kt
[cc_kotlin]
override fun onCreateView(inflater: LayoutInflater, container: ViewGroup?, savedInstanceState: Bundle?): View? {
val view = inflater.inflate(R.layout.fragment_third, container, false)
view.buttonBack.setOnClickListener {
findNavController().navigate(R.id.action_back_to_secondFragment)
}
return view
}
[/cc_kotlin]
これでSecond、ThirdFragmentのBACKボタンをタップすることにより、スタックされた前画面に遷移することができます。ただし、この遷移方法もスタックするので、
[ First(NEXT) > Secound(NEXT) > Third(BACK) > Second ]と遷移し、システムの戻るボタンをタップすると、FirstFragmentではなく、ThirdFragmentに戻ることに注意してください。
システムの戻るボタンで指定したFragmentまで戻る
activity_main.xmlにて指定した[ app:defaultNavHost ]がtrueの場合、システムの戻るボタンをタップすることでスタックされた前画面に戻ることができます。
しかし、ここで特定の画面にいる時、指定した画面に戻させたい場合があると思います。ThirdFragmentにいるとき、システムの戻るボタンをタップしてFirstFragmentに戻りたい場合、何も制御しないとSecondFragmentに戻ってしまいます。
こういったケースを回避するために、[ popUpTo ]という属性がactionタグにあります。
これは、指定した画面に戻ることができ、今までスタックしてきた画面をすべて破棄することができます。
TOP画面→入力画面→入力確認画面→登録完了画面という画面フローがあった場合、登録完了画面からシステムの戻るボタンをタップすると、入力確認画面に戻り、さらに戻るボタンをタップすると入力画面に戻ってしまいます。そう言ったケースを回避し、TOP画面に戻すことができます。
nav_host.xml
[cc_xml]
[/cc_xml]
肝は、戻る処理を制御したい画面の前画面で設定することです。この場合、ThirdFragmentからFirstFragmentに戻したいので、ThirdFragmentの前画面である、SecondFragmentのThirdFragmentに遷移させるactionタグに記述します。ちょっとややこしいですね。
前画面で制御することを覚えておけば、大丈夫です。
Global Action
Navigation GraphにすべてのFragmentタグからアクセスできる[ Global Action ]というものがあります。
どこの画面からもアクセスができる画面があった場合に重宝するやり方です。
例えば、どの画面からもFirstFragmentに戻りたい場合、今回の様に3枚のFragmentでしたらSecond / Thridに戻るactionを記述すればいいですが(この場合も管理が面倒)、何十枚もあった場合、管理が大変です。このようなケースを回避するために、Global Actionを使用します。
ここでは、ThridFragmentからFirstFragmetに遷移するためのGlobal Actionを作成します。
nav_host.xml
[cc_xml]
ThirdFragment.kt
[cc_kotlin]
override fun onCreateView(inflater: LayoutInflater, container: ViewGroup?, savedInstanceState: Bundle?): View? {
val view = inflater.inflate(R.layout.fragment_third, container, false)
view.buttonBack.setOnClickListener {
findNavController().navigate(R.id.action_back_to_secondFragment)
}
// 下記リスナ追加
view.buttonTop.setOnClickListener {
findNavController().navigate(R.id.global_action_back_to_first) // ここでGlobal Actionを指定する
}
return view
}
[/cc_kotlin]
これでTOPボタンをタップするとFirstFragmentに遷移することができ、またpopUpTo属性があるので、システムの戻るボタンでアプリが終了します。
補足
ここまで長々と説明しましたが、これまでのことをワンクリックでできる方法があります(Global Actionはなかったですが)。
新規プロジェクトを作成した際に、プロジェクトテンプレートが選択できるダイアログが表示されます。
そのダイアログで[ Basic Activity ]を選択すると、1枚のActivityと、2枚のFragment、そしてそのFragmentの遷移をNavigationで実装したプロジェクトが作成されます!
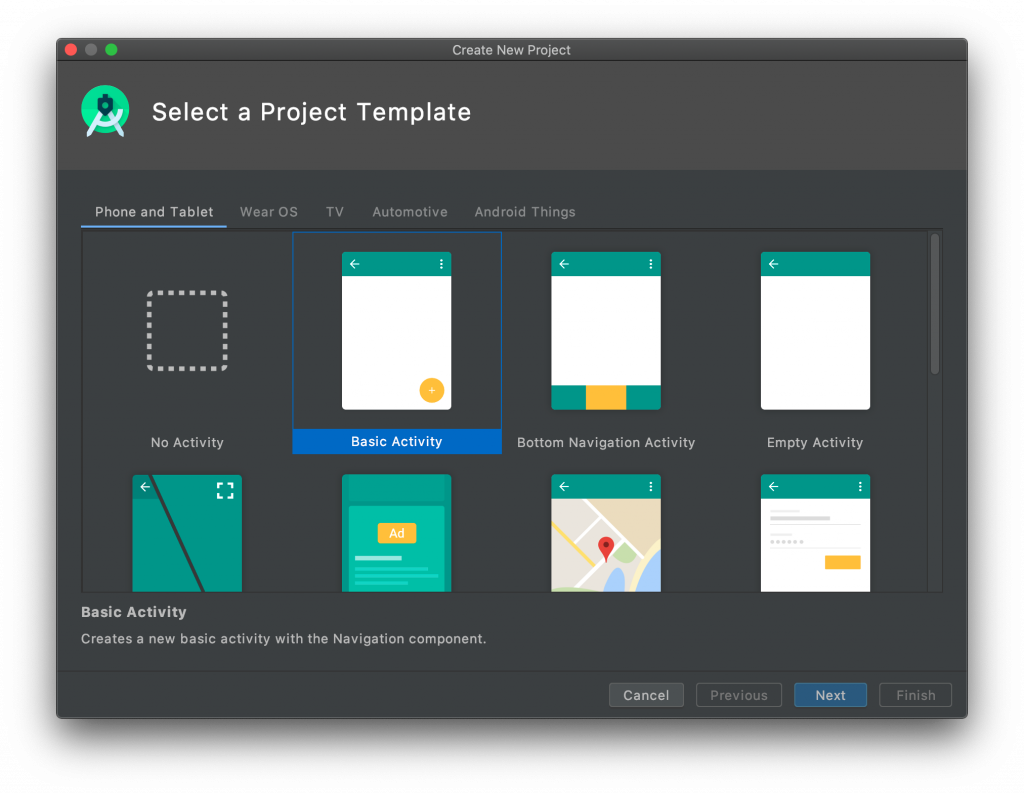
Navigationを一から作成するのが億劫な人にとっては、有り難いテンプレートですので、こちらも是非覚えておくとちょっと幸せになるかもしれません。
以上となります。
Navigationを使用して、画面遷移を簡単に実装する方法でした!(管理も楽に!)
それではまたの機会に!
↓↓↓ぜひチェックしてください
~提供中のヒューマンセンシング技術~
◆なりすまし判定技術
eKYC・顔認証のなりすまし対策を!
https://bio-check.pas-ta.io
◆まばたき検出技術
PCやスマホアプリに組み込めて高精度にまばたきを検出
https://blink.pas-ta.io
◆視距離推定技術
単一RGBカメラで、目からカメラまでの距離を推定
https://vd.pas-ta.io
◆虹彩認証技術
目の虹彩を利用した生体認証技術
https://iris.pas-ta.io
◆視線検出技術
アイトラッキングや次世代UIに
https://eyetrack.pas-ta.io
◆目検出技術
あらゆる目周りデータを高精度に取得
https://pupil.pas-ta.io