【Kotlin】NumberPickerを使用したダイアログの実装
2020.05.11

どうも、むつたくです。
今回は、Swiftでお馴染みのUIPickerViewをAndroidのダイアログ上で実装する方法を紹介します。
Androidでは「NumberPicker」と言います。
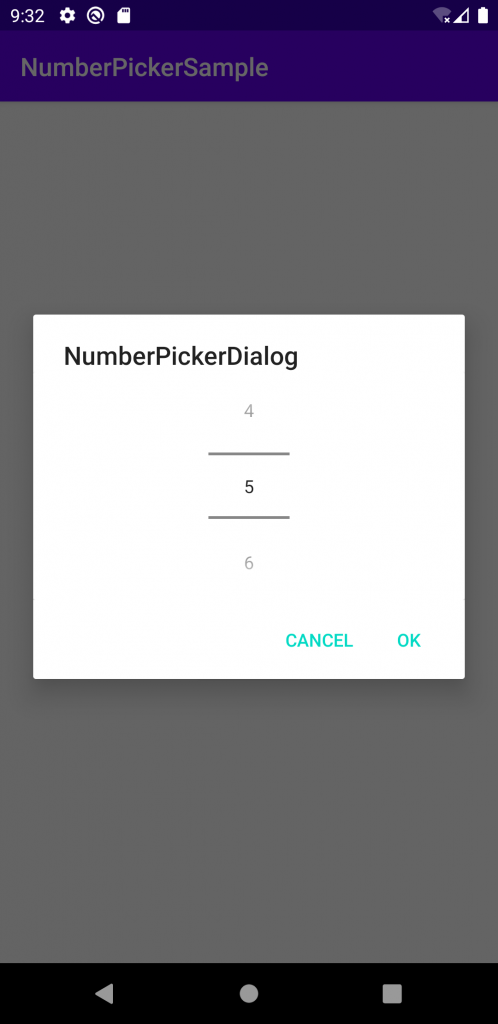
ユーザに複数選択させたい時とかは便利ですね。イメージはこんな感じです。
今回使用するダイアログは「AlertDialog」になります。
今回やること
公式リファレンス
開発環境
- macOS Catalina 10.15.3
- AndroidStudio 3.6.2
- Kotlin 1.3.61
NumberPickerの使い方
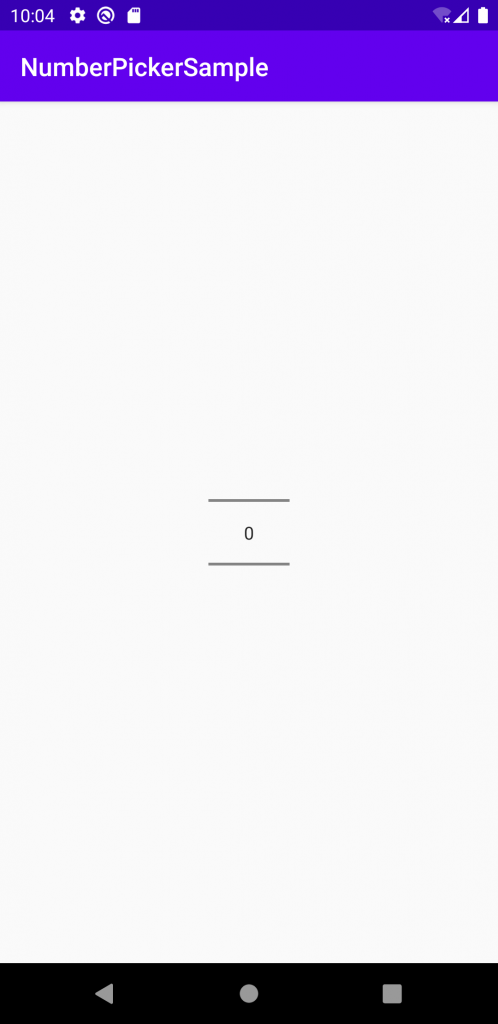
まずは、NumberPickerで選択したアイテムをTextViewに表示するということを実装します。
さて、NumberPickerですが、デザインのPaletteから選択することが出来ません。なぜか一覧にない…。
なのでXMLから作成していきます。まずはXML全体から。
activity_main.xml
[cc_xml]
[/cc_xml]
まずは、こんな感じになっていればOKです。
NumberPickerを使用する際には、以下のXMLコードをコピペすればデザイン上でもドラッグ出来るようになります。
[cc_xml]
[/cc_xml]
次はktファイルです。
MainActivity.kt
[cc_kotlin]
import androidx.appcompat.app.AppCompatActivity
import android.os.Bundle
import android.widget.NumberPicker
import android.widget.TextView
class MainActivity : AppCompatActivity() {
override fun onCreate(savedInstanceState: Bundle?) {
super.onCreate(savedInstanceState)
setContentView(R.layout.activity_main)
this.initNumberPicker()
}
/**
* NUmberPicker初期化メソッド
**/
private fun initNumberPicker() {
val np = findViewById
np.minValue = 1 // NumberPickerの最小値設定
np.maxValue = 10 // NumberPickerの最大値設定
np.value = 5 // NumberPickerの初期値
// NumberPickerのアイテムチェンジリスナー
np.setOnValueChangedListener { picker, oldVal, newVal ->
println(“前回選択値: $oldVal”)
println(“現在選択値: $newVal”)
// 選択したアイテムをTextViewに表示
findViewById
}
}
}
[/cc_kotlin]
要所にコメントは書いてありますが、NumberPickerで使用しているのは以下のプロパティになります。
| プロパティ名 | 説明 |
|---|---|
| minValue | NumberPickerの最小値を設定 |
| maxValue | NumberPickerの最大値を設定 |
| value | NumberPickerの初期値を設定 |
NumberPickerで選択した値をTextViewに表示するのは「setOnValueChangedListener」になります。
引数には以下の内容が格納されます。
| 引数 | 説明 |
|---|---|
| picker | アイテムチェンジしたNumberPickerのクラス |
| oldVal | 該当NumberPickerの前回値 |
| newVal | 該当NumberPickerの現在値 |
NumberPickerの使い方は以上になります。
AlertDialogの作成
次は、AlertDialogを作成していきます。このダイアログの中にNumberPickerを配置します。
作成手順は以下の3ステップになります。
- LayoutXML作成
- CustomDialogClass作成
- MainActivity.ktからコール
LayoutXML作成
まずはXMLを書きます。「res/layout」ディレクトリ直下に「Layout XML File」を作成します(New > XML > Layout XML File)。
ファイル名はここでは「number_picker_dialog.xml」にしました。
ダイアログのXMLは以下になります。
number_picker_dialog.xml
[cc_xml]
[/cc_xml]
CustomDialogClass作成
次はダイアログのコードを書きます。「java/[PackageName]」ディレクトリ直下に「Kotlin Class」を作成します(New > Kotlin File/Class)。
作成する際は「Class」を選択して下さい。
ファイル名はここでは「NumberPickerDialog.kt」にしました。
NumberPickerDialog.kt
[cc_kotlin]
import android.app.AlertDialog
import android.app.Dialog
import android.os.Bundle
import android.widget.NumberPicker
import androidx.fragment.app.DialogFragment
class NumberPickerDialog: DialogFragment() {
/**
* ダイアログ作成
**/
override fun onCreateDialog(savedInstanceState: Bundle?): Dialog {
val inflater = activity!!.layoutInflater
val dialogView = inflater.inflate(R.layout.number_picker_dialog, null)!!
val builder = AlertDialog.Builder(context)
// Dialogの設定
builder.setView(dialogView)
builder.setTitle(“NumberPickerDialog”)
builder.setPositiveButton(“OK”) { dialog, id ->
}
builder.setNegativeButton(“CANCEL”) { dialog, id ->
}
// NumberPickerの設定
val np = dialogView.findViewById
np.minValue = 1 // NumberPickerの最小値設定
np.maxValue = 10 // NumberPickerの最大値設定
np.value = 5 // NumberPickerの初期値
return builder.create()
}
}
[/cc_kotlin]
ここでのポイントが2つあります。
1つ目のポイントは、DialogFragmentクラスを継承します。
そうすることで、ダイアログを扱うことが出来る様になります。
2つ目ポイントは、AlertDialog.Builderです。
このメソッドを使用することでAlertDialogのViewを変更できたり、ボタンやタイトルを設定することができます。
19行目の「builder.setView」に先ほど作成したLayoutファイルを指定します。
20行目の「builder.setTitle」ではダイアログのタイトルを設定してます。
21行目の「builder.setPositiveButton」では後述しますが、ボタンを配置します。こちらはダイアログの内容を完了させる意味合いを持ちます。
23行目の「.setNegativeButton」ではこちらも後述しますが、同じくボタンを配置します。このボタンはダイアログの内容をキャンセルする意味合いを持ちます。
MainActivity.ktからコール
ダイアログを作成したので、親からこのダイアログをコールします。
activity_main.xml
[cc_xml]
[/cc_xml]
MainActivity.kt
[cc_kotlin]
import androidx.appcompat.app.AppCompatActivity
import android.os.Bundle
import android.widget.Button
class MainActivity : AppCompatActivity() {
override fun onCreate(savedInstanceState: Bundle?) {
super.onCreate(savedInstanceState)
setContentView(R.layout.activity_main)
findViewById
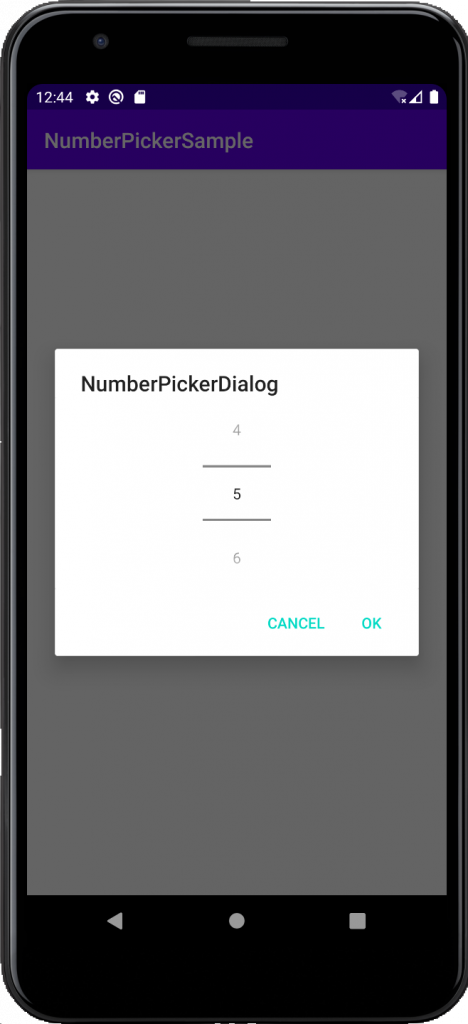
DIALOGボタンをタップするとこんな画面が表示されればOKです。
親画面に値を渡す
今度はOKボタンをタップしたら親画面に値を渡す処理をやっていきます。
NumberPickerDialog.kt
[cc_kotlin]
import android.app.AlertDialog
import android.app.Dialog
import android.content.Context
import android.os.Bundle
import android.util.Log
import android.widget.NumberPicker
import androidx.fragment.app.DialogFragment
class NumberPickerDialog: DialogFragment(), NumberPicker.OnValueChangeListener {
private lateinit var listener: NoticeDialogListener // 親に渡すためのリスナー定義
private var selectedItem: Int = 0 // 選択したアイテム格納
interface NoticeDialogListener {
fun onNumberPickerDialogPositiveClick(dialog: DialogFragment, selectedItem: Int)
fun onNumberPickerDialogNegativeClick(dialog: DialogFragment)
}
override fun onAttach(context: Context) {
super.onAttach(context)
try {
this.listener = context as NoticeDialogListener
} catch (e: ClassCastException) {
throw ClassCastException((“$context must implement NoticeDialogListener”))
}
}
/**
* ダイアログ作成
**/
override fun onCreateDialog(savedInstanceState: Bundle?): Dialog {
val inflater = activity!!.layoutInflater
val dialogView = inflater.inflate(R.layout.number_picker_dialog, null)!!
val builder = AlertDialog.Builder(context)
// Dialogの設定
builder.setView(dialogView)
builder.setTitle(“NumberPickerDialog”)
builder.setPositiveButton(“OK”) { _, _ ->
this.listener.onNumberPickerDialogPositiveClick(this, this.selectedItem) //
}
builder.setNegativeButton(“CANCEL”) { _, _ ->
this.listener.onNumberPickerDialogNegativeClick(this)
}
// NumberPickerの設定
val np = dialogView.findViewById
np.setOnValueChangedListener(this)
np.minValue = 1 // NumberPickerの最小値設定
np.maxValue = 10 // NumberPickerの最大値設定
np.value = 5 // NumberPickerの初期値
return builder.create()
}
override fun onValueChange(picker: NumberPicker?, oldVal: Int, newVal: Int) {
this.selectedItem = newVal
Log.d(“item”, this.selectedItem.toString())
}
override fun onDestroy() {
super.onDestroy()
}
override fun onDetach() {
super.onDetach()
}
}
[/cc_kotlin]
ActivityMain.kt
[cc_kotlin]
import androidx.appcompat.app.AppCompatActivity
import android.os.Bundle
import android.widget.Button
import android.widget.TextView
import androidx.fragment.app.DialogFragment
class MainActivity : AppCompatActivity(), NumberPickerDialog.NoticeDialogListener {
override fun onCreate(savedInstanceState: Bundle?) {
super.onCreate(savedInstanceState)
setContentView(R.layout.activity_main)
findViewById
override fun onNumberPickerDialogPositiveClick(
dialog: DialogFragment,
selectedItem: Int
) {
val text = findViewById
text.text = selectedItem.toString()
}
override fun onNumberPickerDialogNegativeClick(dialog: DialogFragment) {
return
}
}
[/cc_kotlin]
細かく見ていくと、まずはインターフェースを作成します。このインターフェースで親とのやり取りを行うと思えばOKです。
[cc_kotlin]
interface NoticeDialogListener {
fun onNumberPickerDialogPositiveClick(dialog: DialogFragment, selectedItem: Int)
fun onNumberPickerDialogNegativeClick(dialog: DialogFragment)
}
[/cc_kotlin]
親側ではダイアログで選択したアイテム、もしくはキャンセルした時の状態を受け取るので受け皿を準備します。「NumberPickerDialog.NoticeDialogListener」の継承も忘れずに。インターフェース名はダイアログで定義した名前になります。
今回は、OKボタンがタップされたらTextViewに選択したアイテムを表示する処理を、キャンセルボタンをタップしたら特に何もしないので、上記のような処理になってます。
[cc_kotlin]
class MainActivity : AppCompatActivity(), NumberPickerDialog.NoticeDialogListener
…
override fun onNumberPickerDialogPositiveClick(
dialog: DialogFragment,
selectedItem: Int
) {
val text = findViewById
text.text = selectedItem.toString()
}
override fun onNumberPickerDialogNegativeClick(dialog: DialogFragment) {
return
}
[/cc_kotlin]
onAttachメソッドを使用することで、ActivityMainへイベントを伝搬することが出来るようになります。(ActivityではなくContextですが)
[cc_kotlin]
private lateinit var listener: NoticeDialogListener
override fun onAttach(context: Context) {
super.onAttach(context)
try {
this.listener = context as NoticeDialogListener
} catch (e: ClassCastException) {
throw ClassCastException((“$context must implement NoticeDialogListener”))
}
}
[/cc_kotlin]
そして、ダイアログのボタンタップイベントで先に定義したインターフェースのメソッドを実行して親に渡しているといった感じになります。
[cc_kotlin]
override fun onCreateDialog(savedInstanceState: Bundle?): Dialog {
…
builder.setPositiveButton(“OK”) { _, _ ->
this.listener.onNumberPickerDialogPositiveClick(this, this.selectedItem)
}
builder.setNegativeButton(“CANCEL”) { _, _ ->
this.listener.onNumberPickerDialogNegativeClick(this)
}
…
}
[/cc_kotlin]
これで親に選択したアイテムを渡すことが出来るようになりました。インターフェースを使用して親に選択したアイテムを渡すのはCustomDialogだけではなく、CheckDialog、RadioDialog等々の他のダイアログでも使用できるので、この方法は覚えておくといいかもしれません。
以上になります。AlertDialogを使用したNumberPickerの実装は意外と簡単に出来ちゃいます。
それでは良いKotlinライフを!
↓↓↓ぜひチェックしてください
~提供中のヒューマンセンシング技術~
◆人物検出技術
歩行者・来店者数計測やロボット搭載も
https://humandetect.pas-ta.io
◆視線検出技術
アイトラッキングや次世代UIに
https://eyetrack.pas-ta.io
◆生体判定技術
eKYC・顔認証のなりすまし対策を!
https://bio-check.pas-ta.io
◆目検出技術
あらゆる目周りデータを高精度に取得
https://pupil.pas-ta.io
◆音声感情認識技術
会話から怒りや喜びの感情を判定
https://feeling.pas-ta.io
◆虹彩認証技術
目の虹彩を利用した生体認証技術
https://iris.pas-ta.io